
Discover how delicious healthy food can taste!

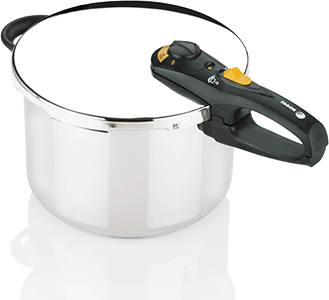
Pressure Cooker Safety
Modern pressure cookers have multiple built-in safety features, but it is still important to pay attention to certain details.
• Be sure to read your pressure cooker manual carefully.
•Before cooking, make sure are that the inner part of lid rim, outer rim of pot, and the valve are clean. Check that the gasket is flexible and not dried out; replace, if necessary.
•Do not fill the cooker more than two-thirds full (half full for foods that may froth, e.g. beans and grains, or are mostly liquid).
•Once the cooker reaches high pressure, it is important to lower the heat immediately. If using an electric stove, use the two-burner system. While bringing the cooker to high pressure over high heat, heat a second burner at low heat. When the cooker reaches pressure, move it to the second burner.
•When removing lid, tilt it away from you to protect yourself from the escaping steam.
Please Release Me!
When you have finished cooking, you must release the pressure before you can open the lid to the cooker. There are three ways to do this. The appropriate method for releasing pressure depends on the type of food you are cooking. Follow recipe instructions.
•Cold Water Release Method. Place the pressure cooker in the sink. Hold the cooker at a slight angle and run cold water over the outer edge of the lid so that it flows over the lid and down sides. Do not let water run directly over vent or valve. This is the fastest method for releasing pressure and a good option when cooking certain vegetables that you want to stop the cooking quickly to prevent overcooking.
•Quick Release Method. Modern pressure cookers have a special valve that can be used to release pressure quickly. This method is useful when you wish to stagger the addition of ingredients, a stew in which the vegetables are added toward the end of cooking, for example. However, do not use the quick release method for foods that are mostly liquid or have a tendency to froth because the froth might clog the valve. Avoid using this method with meat because the rapid release in pressure will cause it to toughen.
•Natural Release Method. Simply remove the cooker from the heat and let the pressure subside naturally. Allow 5 to 15 minutes for this process. This method is recommended for meat, foods that may froth and those that are mostly liquid.
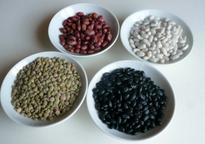
It’s Magic: Pressure Cooking Dried Beans
The ease and speed of cooking dried beans in a pressure cooker is reason enough to invest in a cooker. Dried beans are less expensive than canned and, and my opinion, tastier. You can also control how much salt to use. Here’s how to pressure cook dried beans:
•Pick over and rinse beans. Cover with 3 inches cold water and let soak at least 4 hours or up to 24 hours. Alternatively, place beans in large saucepan. Cover with 3 inches cold water and bring to a boil. Cook for 2 minutes. Remove from heat. Let stand for 1 hour. Drain beans.
•Place beans in pressure cooker. Add aromatics, such as 1 peeled halved onion, 1 peeled carrot, 1 stalk celery, 8 cloves peeled garlic, 1 teaspoon dried thyme and a bay leaf, if desired. Add 3 cups water for each cup of beans. Do not fill cooker more than half full. Add 1 tablespoon vegetable oil for each cup of beans (important; this helps prevent foaming). Secure pressure cooker lid and bring to high pressure over high heat. Reduce heat to lowest setting that maintains high pressure and cook 8 minutes for cannellini beans, 10 minutes for black beans, or 12 minutes for chick peas. Allow pressure to drop naturally. This will take 5 to 10 minutes. If beans are not tender, secure lid and return cooker to high pressure. Reduce heat and cook 2 minutes. Let pressure drop naturally. Season beans with salt to taste. Drain, reserving cooking liquid, if desired. Discard vegetables and bay leaf. (The bean broth is the flavorful bonus—use it in soups and stews, instead of chicken or vegetable broth.)
~Patsy Jamieson
PRESSURE COOKER BASICS
| ||||
| ||||