Discover how delicious healthy food can taste!


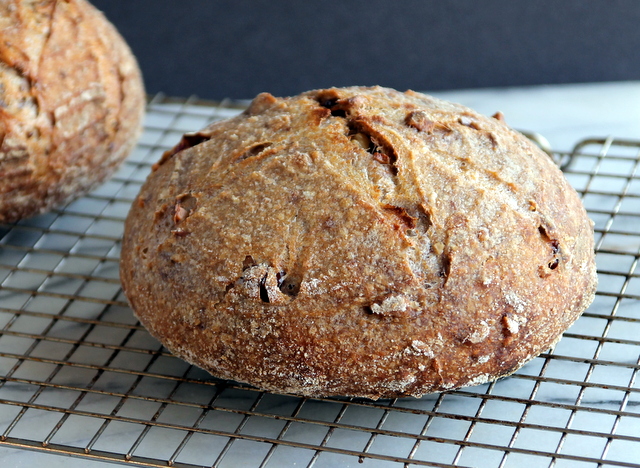
WHOLE-WHEAT SOURDOUGH COUNTRY BREAD
Baking sourdough bread is really more of a lifestyle than just a recipe. Certainly it is a commitment, but learning to make this bread delivers rich rewards. Once you taste it and savor the fabulous crust, you will be hooked and want to bake on a regular basis. Once your sourdough starter is ready, the entire process of making dough and baking loaves takes 2 to 3 days, but there is very little active time involved; mostly it is just baby sitting while the magic of sourdough develops incredible flavors from a simple mixture of flour and water (plus a little salt). This recipe is adapted from Tartine Bread by Chad Robertson (Chronicle Books). Click here for how-to photos.
Note: This recipe may seem detailed and involved, but it is actually very forgiving and not difficult to do once you understand the process.
TIMELINE:
• If you don’t have a sourdough starter on hand, 7-10 days before mixing dough, prepare sourdough starter (directions follow).
•If using an existing starter, 2 days before mixing dough, refresh it (directions follow) to bring it back to life.
•The night before bulk fermentation, make the levain (directions follow). Also soak flours in water as directed in recipe.
•The following day, mix the flour-water mixture with the levain. This takes just a few minutes. Total bulk fermentation time is 4 to 6 hours. During bulk fermentation, you need to turn the dough every half hour or so. None of these steps take a long time, but you have to be around to turn the dough.
•Shape the dough into loaves. This is a 2-step process with a 20-minute rest between each step. Each step takes 5-10 minutes. You can let the shaped loaves rise at room temperature for 3 to 4 hours, or in the refrigerator overnight. I prefer to refrigerate the loaves overnight because it is easier to unmold cold loaves from proofing baskets. The cool temperature of the fridge also allows the loaves to develop more flavors.
•Bake loaves. You can do this on the same day as bulk fermentation or the following day. Depending on whether you let the loaves rise at room temperature or in the refrigerator overnight, plan on 2-3 days to prepare dough and bake loaves.
EQUIPMENT:
•Selection of small and large mixing bowls, rubber spatulas and wooden spoons.
•Digital scale with metric measurements.
•Instant-read thermometer.
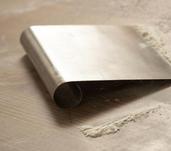
•Bench knife/dough scraper.
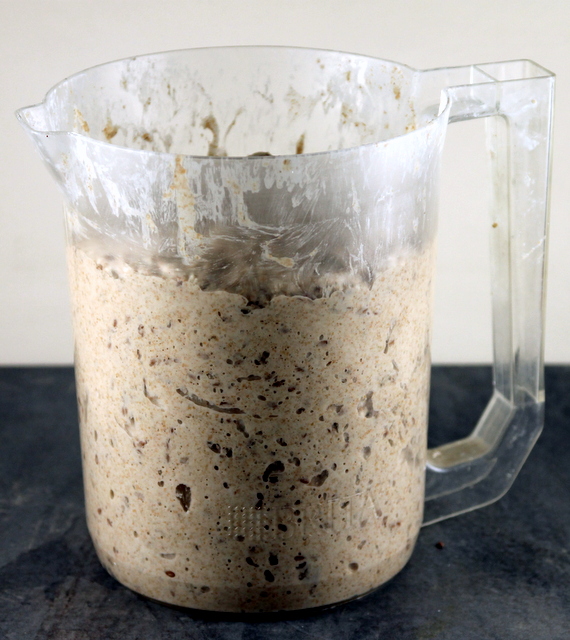
•Container for proofing the dough. I use a Brita pitcher (without the filter). You could also use a large bowl.
•2 large or 4 small proofing (brotform) baskets. You can also use bowls, lined with clean kitchen towels.
•Plastic wrap.
•Pizza baking stone. If you don’t have one, you can bake the loaves on the heated top of a combo-cooker Dutch oven or inside an enameled cast-iron Dutch oven.
•Dutch oven. The Lodge cast-iron combo-cooker Dutch oven is recommended.
•Pizza peel/paddle.
•Parchment paper.
•Lame for scoring the loaves prior to baking. You can also use an Xacto knife or box cutter (reserved for food), or scissors.
•Sturdy oven mitts. Do not use mitts with silicone grip; the silicone can melt when it handles the very hot Dutch oven.
•Sturdy metal spatula.
•Cooking rack.
You do not need an electric mixer!
Yield: 2 (2-pound) or 4 (1-pound loaves), about 36 (1/2-inch-thick) slices total
INGREDIENTS:
Levain:
100 grams (about 3/4 cup) whole-wheat flour
100 grams (about 3/4 cup) bread flour
200 grams (7/8 cup) water (78ºF), preferably filtered
1 heaping tablespoon active sourdough starter
Dough:
600 grams (about 4 1/2 cups) whole-wheat flour
400 grams (about 3 cups) bread flour
760-800 grams (3 1/3-3 2/3 cups plus 2 tablespoons) water (80ºF), preferably filtered (see Tip)
20 grams (1 tablespoon) fine sea salt mixed with 50 grams (3 tablespoons plus 1 teaspoon) water (80ºF), preferably filtered 98 grams
(2/3 cup) unsalted sesame seeds (optional)
112 grams (2/3 cup) flaxseeds (optional)
98 grams (2/3 cup) unsalted sunflower seeds (optional)
Cooking spray, if using proofing baskets
All-purpose flour or bread flour and rice flour for dusting
PREPARATION:
1. Make levain: The night before bulk fermentation, whisk 100 grams whole-wheat flour and 100 grams bread flour in a medium bowl. Stir in 200 grams water to make a soft dough with the consistency of thick pancake batter. Add sourdough starter and mix well. (Discard the remaining starter or feed it – directions below - to give to friends). Cover bowl with plastic wrap and let the levain rise at room temperature overnight.
2. Start dough: Also, the night before bulk fermentation, soak flour in water. Combine whole-wheat flour and bread flour in large bowl; whisk to blend. Gradually stir in water, adding enough to moisten all the flour and make a soft dough. Cover with plastic wrap and let stand at room temperature overnight.
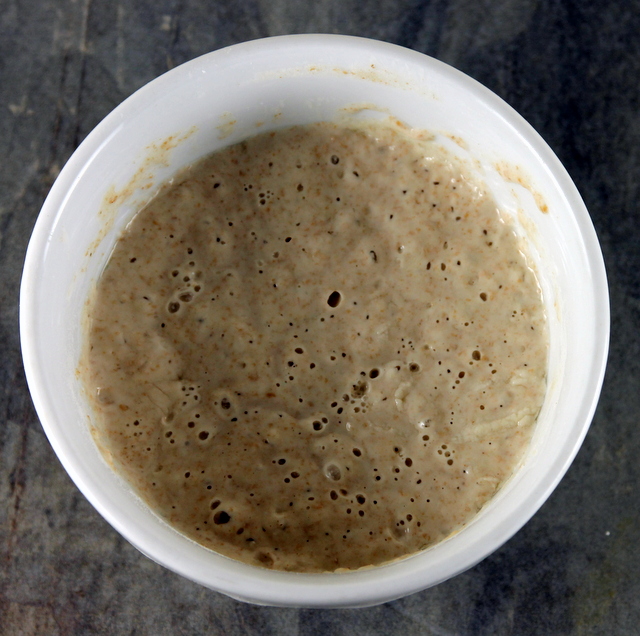
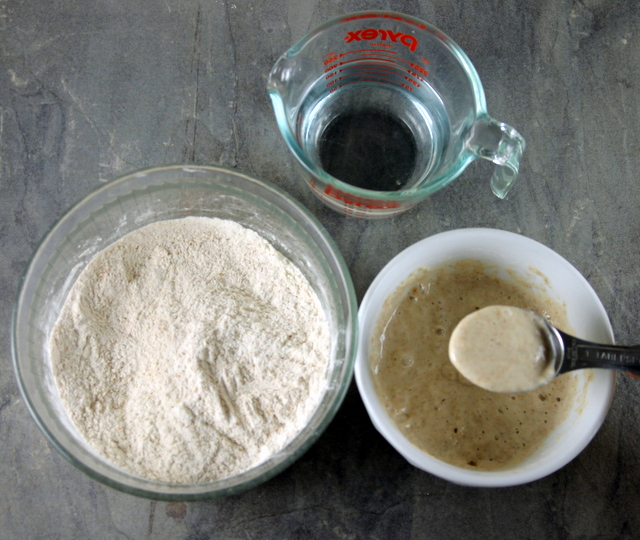
3. Finish dough: The following day, the levain should be light and bubbly with an aroma similar to white wine or yogurt. Weigh 200 grams (1 cup) of the levain and save the unused portion of levain. It is your new starter. (Place the new starter in a clean bowl, cover with plastic wrap and refrigerate for up to 1 week, then refresh by feeding again.) Add the 200 grams of levain to the flour-water mixture (from Step 2). Mix well with a wooden spoon. Cover with plastic wrap and let stand at room temperature for 30 minutes.
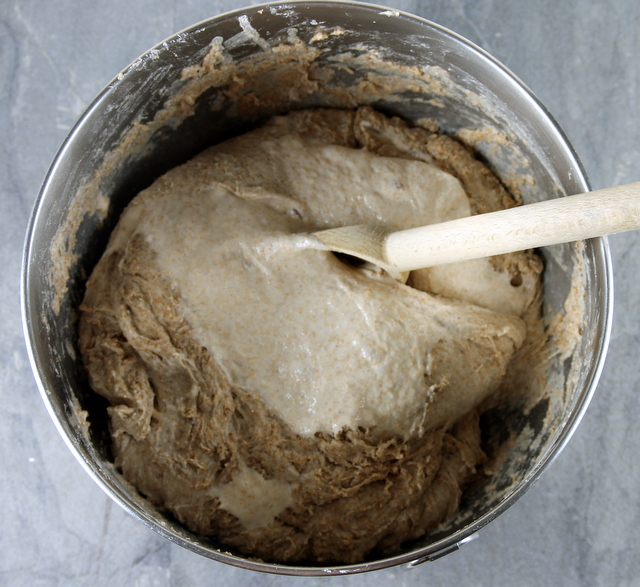
4. Mix salt with 50 grams water and add to dough. Use your hands to work the salt water into the dough. Squeeze the dough between your fingers until all the water has been absorbed. Transfer the dough to a clean dough-rising bucket or large bowl. Cover bowl with plastic wrap.
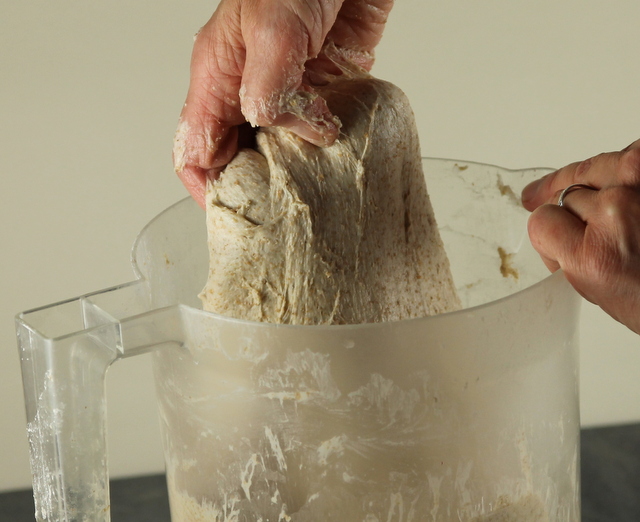
5. Bulk (first) fermentation: This takes 4 to 5 hours, depending on temperature of kitchen. Every 30 minutes or so, give the dough a turn as follows: Wet your hand. Reach down to the bottom of the dough, grab the underside of the dough, lift and stretch it up, then fold it over the top. Give the container a quarter turn and repeat this action. Repeat 2 more times until you have rotated the container a full circle.
6. After the first turn, add seeds, if using: Mix sesame seeds, flaxseeds and sunflower seeds in a small bowl. Add half the seed mixture and work into the dough with your hands. Add remaining seed mixture and mix until incorporated. Continue with bulk fermentation, doing turns every half hour or so, until bulk fermentation is complete. As the dough develops, it will become billowy and noticeably risen. It will feel softer and release from the sides of the container.
7. Divide dough and do first phase of shaping (the bench rest): When the dough is ready, turn it out onto an unfloured work surface. Using a bench knife, cut dough into 2 or 4 equal pieces, depending on whether you are making 2 large loaves or 4 small ones. Sprinkle tops of loaves with all-purpose (or bread) flour. Flip each piece of dough over, so that floured side is on work surface. Using your hands and a bench knife, rotate each piece and work it into a ball. Spray a long piece of plastic wrap with cooking spray. Place it, sprayed side down, over loaves. Let rest for 20 to 30 minutes.
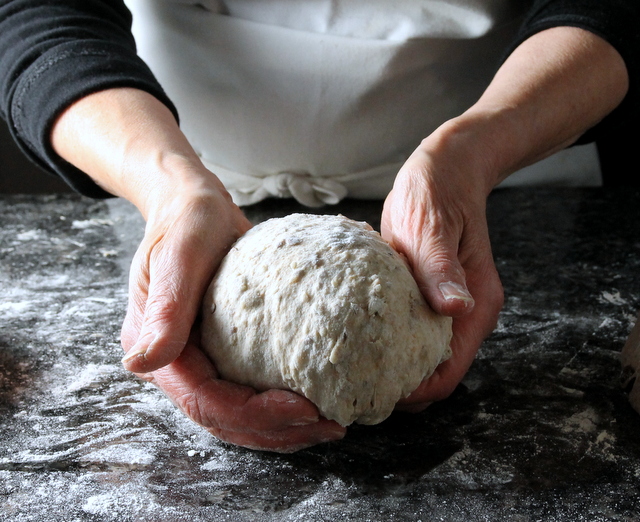
8. Final shaping: Sprinkle tops of loaves with all-purpose (or bread) flour. Flip loaves, so that floured side is on the work surface. With floured hands, grasp the edges of the first loaf, stretch it outwards, then fold both ends towards the center. Repeat in the opposite direction. Flip the loaf, so that it is seam-side down. Cup your hands around the loaf and work into a nice round shape. Repeat with remaining loaf(ves).
9. Mix about ¼ cup all-purpose (or bread) flour and ¼ cup rice flour in a small bowl. If using proofing baskets, spray them with cooking spray, sprinkle with some of the flour mixture and tilt to coat the baskets evenly, shaking out excess. If using bowls, rub the flour mixture into kitchen towels and line the bowls with the floured kitchen towels. Set the shaped loaves in the prepared baskets or lined bowls, placing them seam side up. Cover loaves with plastic wrap. Either let loaves rise at room temperature until puffy, 3 to 4 hours, or let them rise in the refrigerator overnight.
10. About ½ hour before baking, place the pizza stone and bottom of the Dutch oven on rack in the lower third of the oven; preheat to 500ºF. If shaped loaves have been refrigerated, remove 1 large or 2 small loaves from the refrigerator and let them come to room temperature.
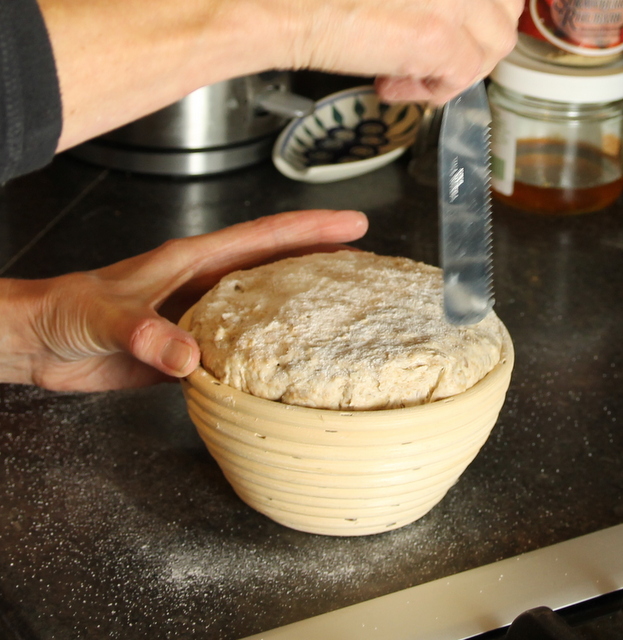
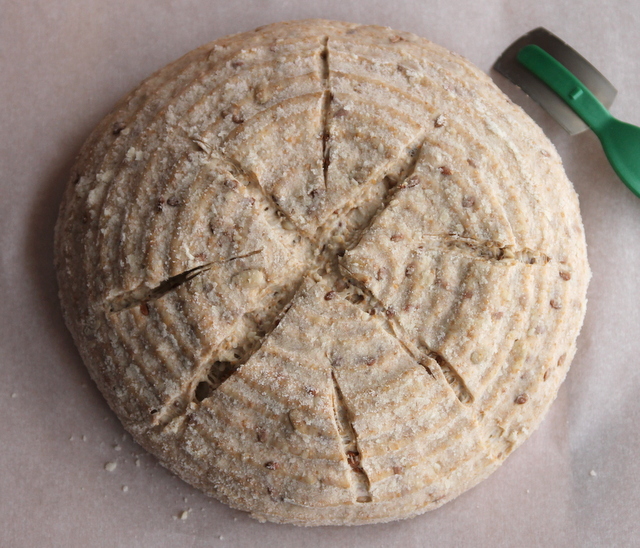
11. Just before baking, place a square of parchment paper, large enough to accommodate a loaf comfortably, on the pizza peel. Place the lame (or Xacto knife) and a cup of water near the loaf. Sprinkle top of the first loaf with rice flour. Slip a palette knife or table knife between loaf and basket and lift loaf to release it from the basket. Repeat, working your way around the loaf until it is completely released from the basket. Carefully invert loaf and unmold onto the parchment-lined pizza peel, catching the loaf with your fingers and setting it gently on the pizza peel to prevent it from deflating when it falls onto the pizza peel. Dip the lame in water, shake off excess, and score the top of the loaf with 2 decisive cuts, forming a criss-cross pattern at the center. Then, make a small cut between each marking to create a sunburst pattern. Alternatively, make 4 cuts to form a square pattern around the center.
12. Working quickly, remove bottom of the Dutch oven from oven. Carefully, slide the loaf, still on the parchment, onto heated baking stone. Immediately, cover the loaf with the Dutch oven bottom. Reduce oven temperature to 450ºF. Bake for 20 minutes. Meanwhile, remove remaining loaf(ves) from the refrigerator and let come to room temperature.
13. After 20 minutes, remove Dutch oven bottom. Bake the loaf until the crust is deep golden brown and the bottom sounds hollow when tapped, 12 to 15 minutes longer for a small loaf or 15 to 25 minutes longer for a large loaf. Lifting the loaf with a metal spatula and your oven mitt, transfer it to a cooling rack. Remove parchment paper from oven and increase oven temperature to 500ºF. Repeat the process with remaining loaf(ves).
14. Let the loaves cool completely before slicing. The loaves will keep, cut side down, on a cutting board or plate, and covered with a kitchen towel for up to 4 days. Unless you are preparing loaves for freezing, never wrap them in plastic wrap! Store whatever bread you won’t eat in a few days in the freezer, wrapped in plastic wrap and then foil. Once the bread is more than a day old or after thawing, it is nice to heat the loaf in a 300ºF-oven for about 10 minutes. Heating the bread helps re-crisp the crust and releases volatile flavor compounds.
Makes about 36 slices total.
Per slice: Calories: 140. Total fat: 3 grams. Saturated fat: 0 grams. Cholesterol: 0 milligrams. Sodium: 220 milligrams. Carbohydrates: 23 grams: Fiber: 3 grams. Protein: 5 grams.
Variations:
•Substitute 1 ½ cups chopped toasted walnuts and 1 ½ cups dried cranberries for the sesame seeds, flaxseeds and sunflower seeds.
•Substitute 1 ½ chopped toasted hazelnuts and 1 ½ cups chopped dried figs for the sesame seeds, flaxseeds and sunflower seeds.
•Substitute 1 cup rye flour for 1 cup of the whole-wheat flour.
•You can shape this dough into rolls or use a portion of it (without seeds) for pizza.
Tip: The amount of water you need varies, depending on the moisture level of the flour and the humidity. The important thing is to add enough water to moisten all the flour and make a soft dough. I bake this bread regularly and I have a grain mill. I notice that I use less water (760 grams) when I use my freshly ground whole-wheat flour. When using commercially ground flour, I find I need to add more water. It is a little harder to work with s softer dough, but a well hydrated dough will have a better texture.
Tip: If you don’t have a pizza stone, turn the loaf onto the heated top of a combo cooker Dutch oven. Place the heated combo cooker bottom over top and place the Dutch oven in the oven to bake following recipe directions. Be sure to wear sturdy oven mitts.
To make Sourdough Starter: Mix 300 grams (1 1/3 cups) warm filtered water (80-85ºF), 165 grams (1 1/8 cups) whole-wheat flour and 150 grams (1 cup plus 1 tablespoon) bread flour in a medium bowl with a wooden spoon. Cover with a kitchen towel and let stand in at warm room temperature for 3 days. It will form a crust and give off a decidedly funky aroma. After 3 days, scrape off the crust and transfer 75 grams (scant ¼ cup) of the starter to a clean bowl. Add 75 grams (about ½ cup plus 1 tablespoon) whole-wheat flour), 75 grams (½ cup plus 1 tablespoon) bread flour and 150 grams (1 ½ cups) warm filtered water (80-85ºF); mix well. The starter will have the consistency of thick pancake batter. Cover with plastic wrap and let stand in a warm place for 24 hours. The following day at about the same time, transfer 75 grams starter to a clean bowl. Repeat the feeding process, adding 75 grams whole-wheat flour, 75 grams bread flour and 150 grams warm water. Continue feeding the starter (discarding all but 75 grams starter before adding additional flour and water) once a day until the mixture is bubbly and light and the aroma is similar to white wine or yogurt, for 5 to 7 days. You are now ready to make a levain and bake bread.
To maintain a starter: Sourdough starter is a living organism and needs to be refreshed (fed with fresh flour and water, which is accomplished each time you bake) every week. Once you have added a portion of the levain to the dough, transfer the remainder to a small bowl, cover and store it in the refrigerator for up to 1 week. About 2 days before baking, discard about half the starter and feed it with 28 grams (about 3 tablespoons) flour and 28 grams (about 2 tablespoons) water. Let stand, covered with plastic wrap, at warm room temperature, for 12 hours. Continue feeding the starter twice a day until you are ready to make levain again. It should become bubbly and give off a pleasant winey aroma.
Adapted by Patsy Jamieson from Tartine Bread (Chronicle Books) by Chad Robertson